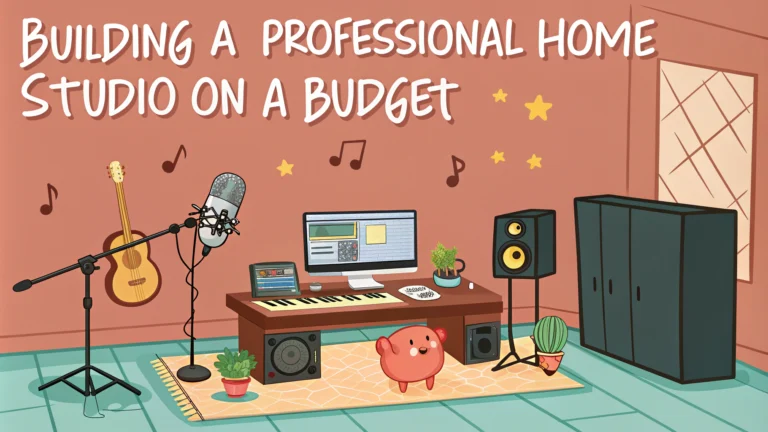
Setting up a home recording studio doesn’t require breaking the bank – you can create professional-quality content with smart equipment choices and proper room setup.
A basic podcasting studio needs just a few essential components: a quality microphone, audio interface, headphones, and some basic acoustic treatment.
This guide walks through the key equipment and setup considerations to help you build a functional home studio without overspending.
Essential Equipment
Microphones ($100-300)
- USB Microphones:
- Blue Yeti ($130) – Versatile USB mic with multiple pickup patterns
- Audio-Technica ATR2100x-USB ($99) – Both USB and XLR outputs
- XLR Microphones:
- Shure SM58 ($99) – Industry standard dynamic mic
- Rode PodMic ($99) – Purpose-built for podcasting
Audio Interface ($100-200)
- Focusrite Scarlett Solo ($120) – Single mic input, excellent preamps
- PreSonus AudioBox ($100) – Reliable 2-channel interface
Headphones ($50-150)
- Sony MDR-7506 ($100) – Industry standard monitoring headphones
- Audio-Technica ATH-M40x ($99) – Balanced sound for monitoring
Room Setup and Acoustics
Choose a quiet room away from external noise sources like streets, HVAC systems, or shared walls.
Basic acoustic treatment can be achieved with household items:
- Hang heavy curtains or blankets on walls
- Place bookshelves along walls to break up reflections
- Use carpet or rugs on hard floors
- Position your desk away from walls to reduce bass buildup
Budget-Friendly Acoustic Solutions
Create DIY acoustic panels using:
- Rockwool insulation ($30-40 per pack)
- Wooden frames ($15-20 per panel)
- Fabric covering ($10-15 per panel)
Software and Recording
Free software options provide professional features:
- Audacity – Free, open-source recording software
- GarageBand – Free for Mac users
- Reaper – Free trial, $60 for full license
Setting Up Your Workspace
Organize your studio efficiently:
- Position microphone at mouth level using a desk mount or boom arm
- Keep cables organized and away from power sources to prevent interference
- Use a pop filter ($10-20) to reduce plosive sounds
- Install LED lighting to reduce heat from traditional bulbs
Next Steps for Your Studio
Start with basic equipment and upgrade gradually as your needs grow and budget allows.
Join online communities like Gearslutz Low-End Theory or r/podcasting for advice and support.
Remember that great content matters more than expensive gear – focus on developing your skills while building your studio setup.
Recording Best Practices
Develop good recording habits from the start:
- Record test sessions to optimize levels and room acoustics
- Keep consistent microphone distance (6-8 inches)
- Monitor audio through headphones while recording
- Save files in high-quality formats (WAV/AIFF)
Maintenance and Care
Protect your investment with proper maintenance:
- Store microphones in cases when not in use
- Clean equipment regularly with appropriate solutions
- Keep backup cables on hand
- Update software and drivers regularly
Common Recording Issues
Troubleshooting Guide
- Background noise:
- Check for running appliances
- Seal windows and doors
- Use noise reduction software
- Audio interference:
- Keep mobile devices away from equipment
- Use balanced cables when possible
- Check for ground loop issues
Creating Professional Content from Home
Success in home recording comes from combining quality equipment, proper setup, and good technique. Start with the basics, focus on acoustic treatment, and upgrade strategically as you develop your skills.
Remember that many successful podcasts and recordings started in simple home setups. With attention to detail and consistent practice, your home studio can produce professional-grade content that rivals commercial facilities.
Stay connected with the recording community, continue learning about audio production, and most importantly, start creating content with the setup you have.
FAQs
- What is the minimum budget needed to build a basic home studio for podcasting?
A basic podcasting home studio can be set up for around $300-500, including a USB microphone, basic acoustic treatment, headphones, and essential software. - Which microphone is best for a budget home studio setup?
The Audio-Technica ATR2100x-USB or the Blue Yeti USB microphone are excellent budget-friendly options, offering good sound quality and versatility for around $100-130. - Do I need acoustic treatment for my home studio?
Yes, basic acoustic treatment is important. Start with acoustic foam panels for early reflections, bass traps for corners, and a reflection filter behind your microphone. DIY solutions like blankets and furniture placement can also help initially. - What software do I need for podcast recording and editing?
Free options include Audacity and GarageBand (Mac), while affordable paid options include Reaper ($60) or Hindenburg ($95). These provide all necessary features for professional podcast production. - What type of headphones should I invest in?
Closed-back headphones like the Sony MDR-7506 or Audio-Technica ATH-M40x ($100 range) are ideal for monitoring and editing due to their accurate sound reproduction and isolation. - How can I soundproof my room on a budget?
Use heavy curtains, weather stripping for doors, rugs on hard floors, and strategically placed furniture. Moving blankets and DIY panels can provide additional sound absorption affordably. - Do I need a mixer or audio interface for podcasting?
Not initially. A good USB microphone is sufficient for starting. However, if you plan to add multiple microphones or require more control, a basic audio interface like the Focusrite Scarlett Solo ($120) is recommended. - What are the most important accessories for a budget home studio?
Essential accessories include a sturdy microphone stand ($20-30), pop filter ($10-15), XLR or USB cables as needed, and a shock mount to reduce vibration noise. - How important is room placement when setting up a home studio?
Room placement is crucial. Choose a quiet room away from outside noise, avoid square rooms if possible, and position your recording setup away from walls and corners to minimize sound reflections. - Can I record professional-quality audio in a small room?
Yes, with proper acoustic treatment, microphone technique, and room setup, you can achieve professional-quality recordings even in a small space.